Monitor specific TOYOTA parameters in real-time, including advanced engine and automatic transmission sensor data, by adding the Advanced LT plugin to Torque Pro. This plugin enhances your Torque Pro experience by extending the PID/Sensor list with specific parameters tailored for TOYOTA vehicles. You can try the plugin with limited sensors before deciding to purchase, although this version does not include calculated sensors like Injector Duty Cycle.
PLEASE NOTE that while other TOYOTA models/engines may be supported, the plugin has been tested on the following specific models/engines:
- Avensis 1.8/2.0 (T270)
- Corolla 1.8/2.0 (E140/E150)
- Corolla 1.6/1.8 (E160/E170)
- Camry 2.4/2.5 (XV40)
- Camry 2.0/2.5 (XV50)
- Highlander 2.7 (XU40)
- Highlander 2.0/2.7 (XU50)
- RAV4 2.0/2.5 (XA30)
- RAV4 2.0/2.5 (XA40)
- Verso 1.6/1.8 (R20)
- Yaris 1.4/1.6 (XP90)
- Yaris 1.3/1.5 (XP130)
The plugin also includes an ECU Scanner, which is highly useful for identifying specific sensors on TOYOTA engines that are not yet supported by the plugin. To utilize this feature, you need to record at least 1000 samples and send the logs to the developer.
Advanced LT requires the latest version of Torque Pro to function properly. It is NOT a standalone application and will NOT work without Torque Pro.
Plugin Installation
- After purchasing the plugin on Google Play, ensure that you see the plugin listed on your Android device's installed applications list.
- Launch Torque Pro and click on the "Advanced LT" icon.
- Select the appropriate engine type and return to the Torque Pro main screen.
- Go to Torque Pro "Settings".
- Verify that the plugin is also listed in Torque Pro by navigating to "Settings" > "Plugins" > "Installed Plugins".
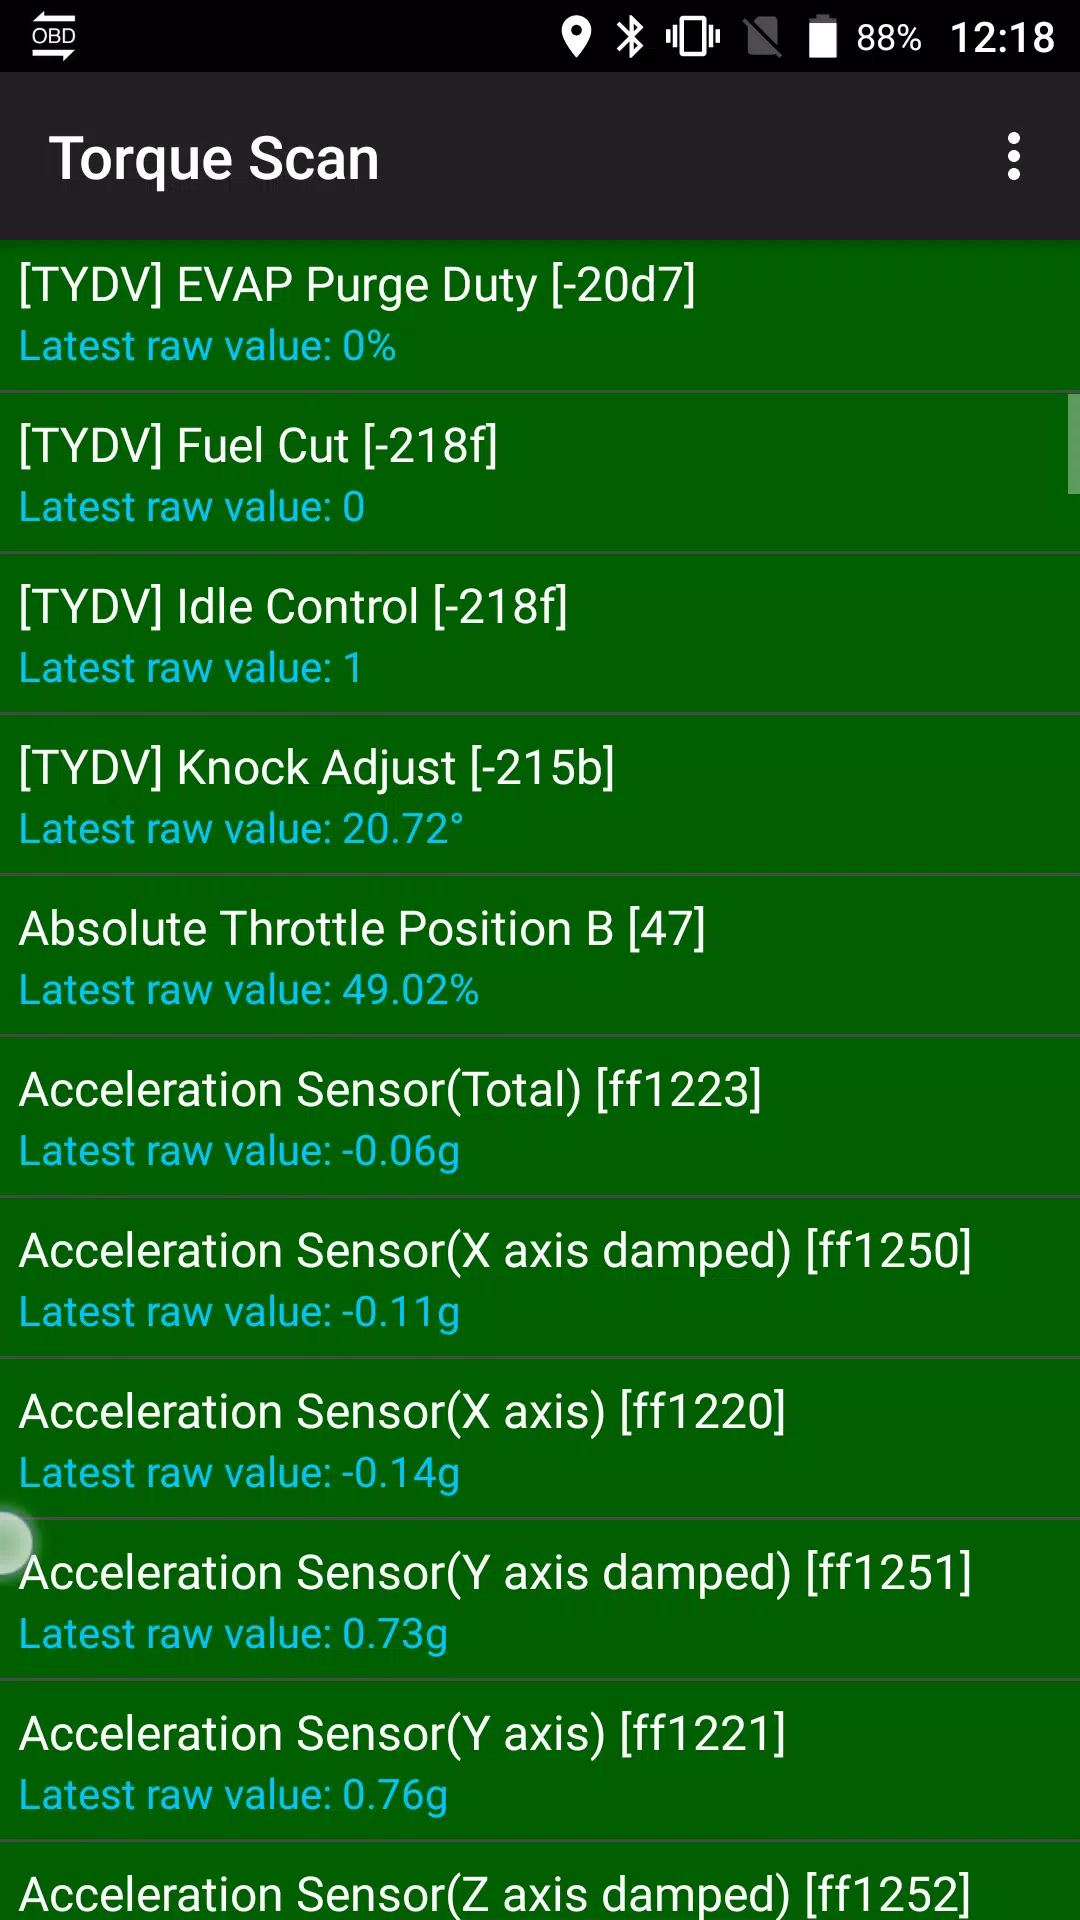
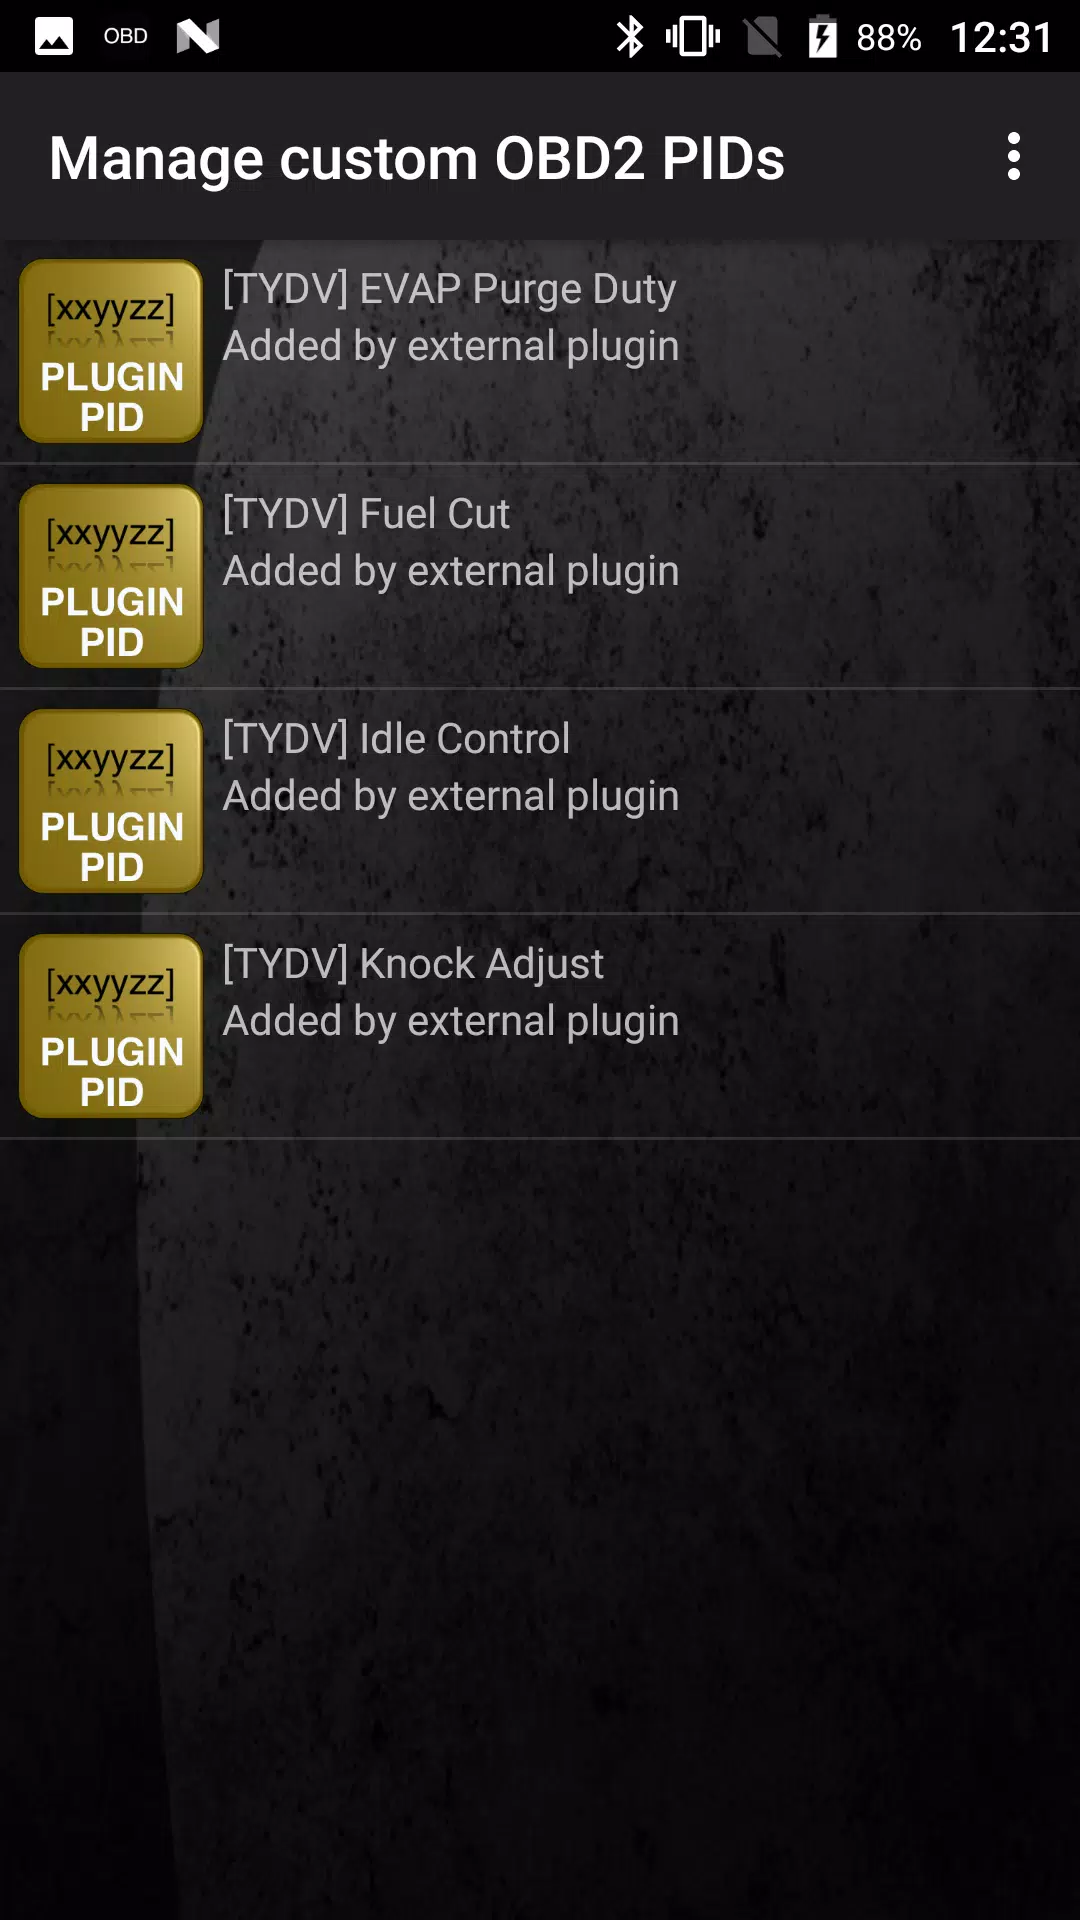
- Scroll down to "Manage extra PIDs/Sensors".
- Typically, this screen will be empty unless you have previously added any pre-defined or custom PIDs.
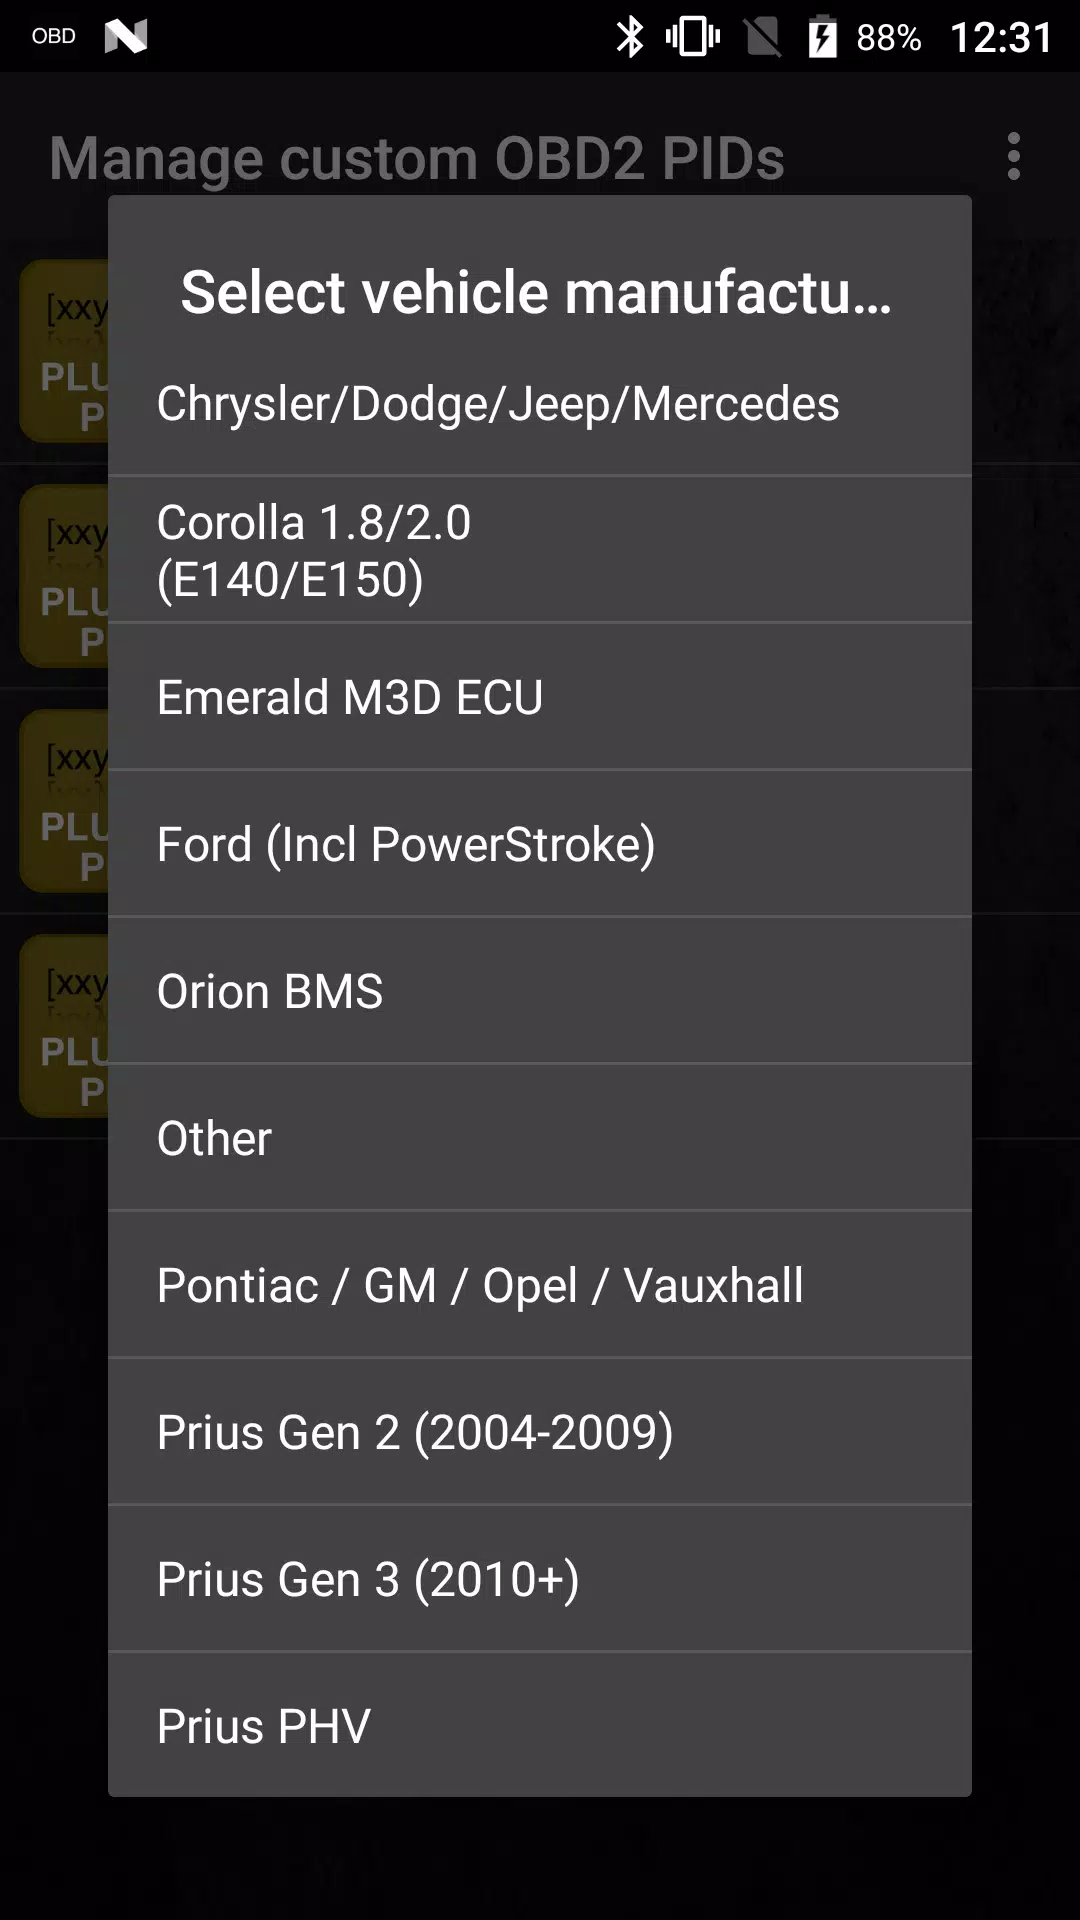
- From the menu, choose "Add predefined set".
- Ensure you select the correct set for your TOYOTA engine type, as other sets may be available.
- After selecting the correct set, several entries will be added to the Extra PIDs/Sensors list.
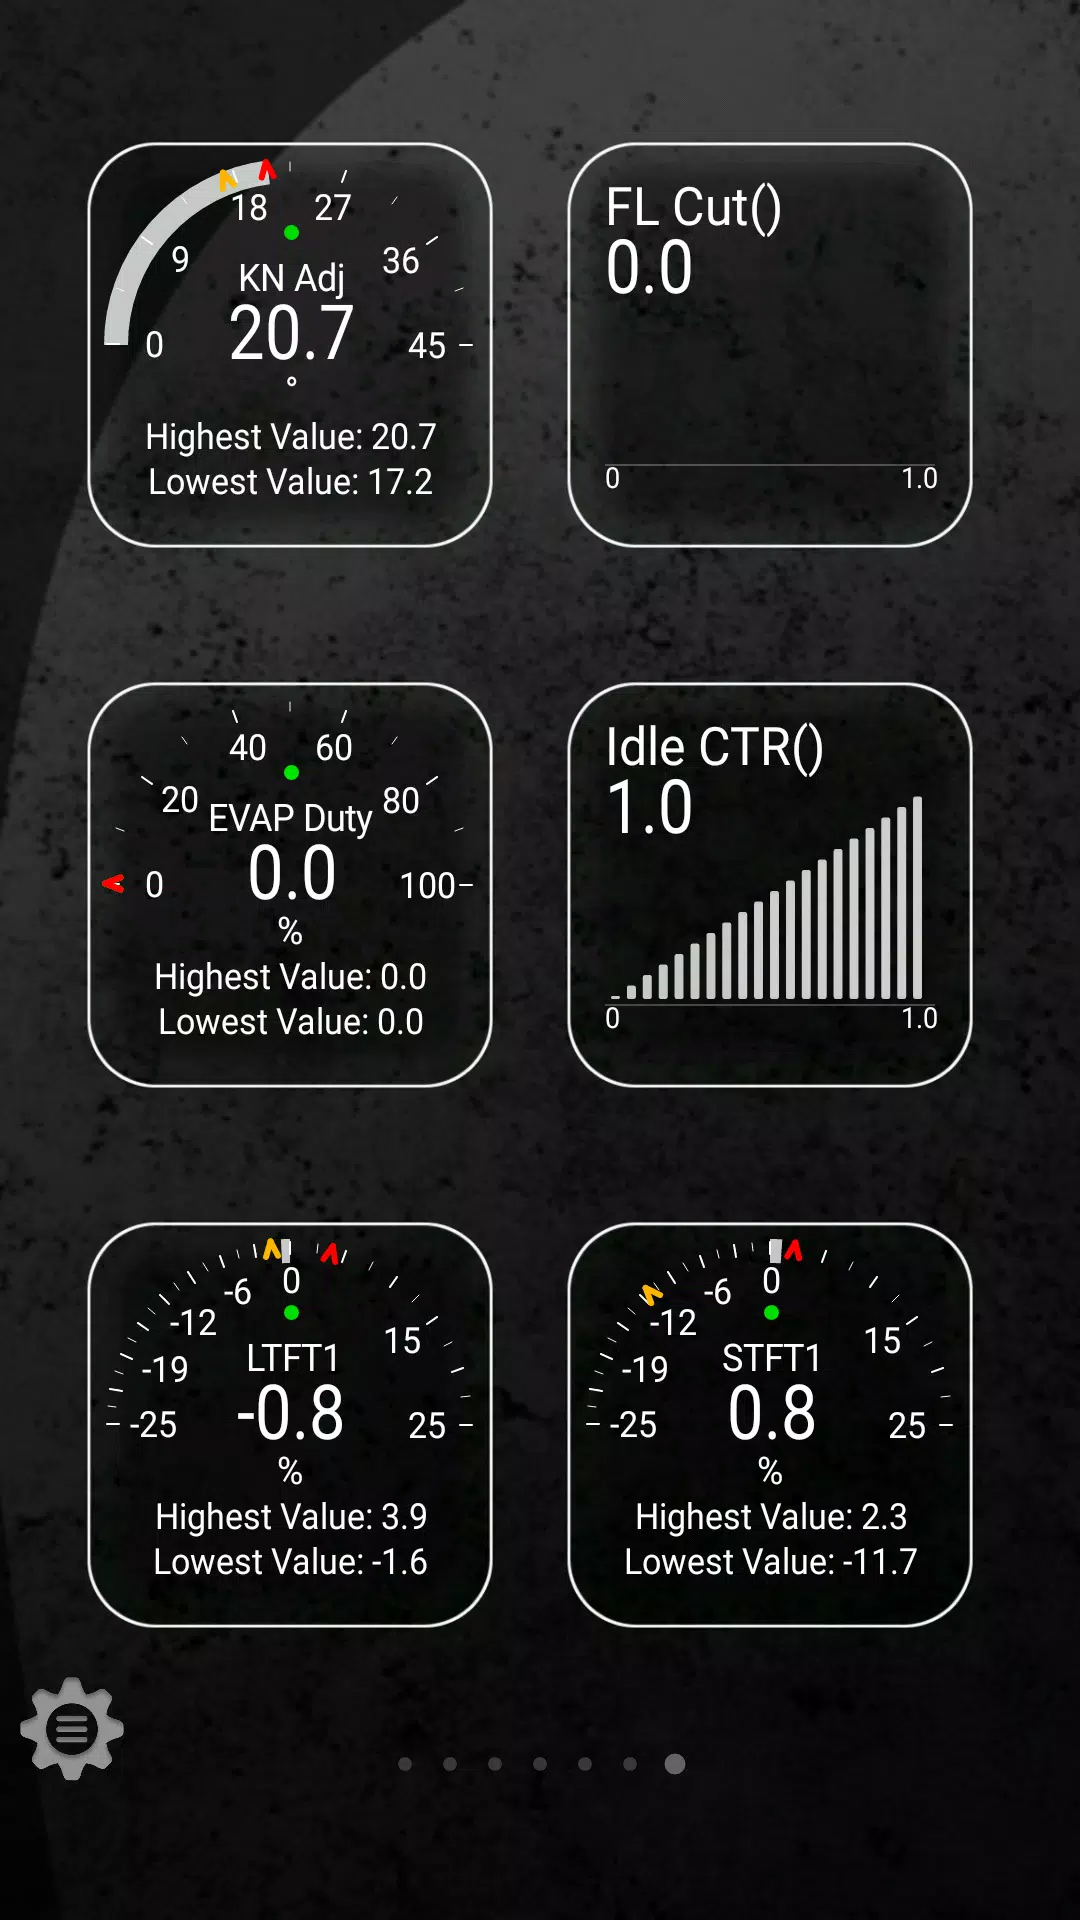
Adding Displays
- Once the additional sensors are added, navigate to the Realtime Information/Dashboard.
- Press the menu key and then click on "Add Display".
- Choose the appropriate display type (Dial, Bar, Graph, Digital Display, etc.).
- Select the appropriate sensor from the list. Sensors provided by Advanced LT are prefixed with "[TYDV]" and should be listed immediately after the time sensors at the top of the list.
Future releases will include more features and parameters. If you have any comments or suggestions, please feel free to share them with me.